On the internet, you can find thousands of video editors. Every video editor target a specific audience.
Wondershare Democreator is developed for teachers, gamers, or anyone who wants to create tutorial videos by recording the screen & camera with some editing.
Here in this article, I will provide demo, features information All Pros & Cons & comparison with other editors of this newly launched democreator.
So at the end of this article No question left in your mind.
Table of contents
what is democreator & Demo
Features of Democreator
Pros & Cons of Demo Creator
Price & system Requirements
Comparsion With Other Products
Conclusion
How DemoCreator is Different From Other Editors?
Wondershare already developed 3 video editors before launching the democreator. This video editor is for those who need an advanced screen recorder & basic video editor.
You can record both screen & web camera simultaneously. You can also add mouse effects while editing.
Consider it as mini version of Camtasia if you are familiar with Techsmith Camtasia.
Unlike other wondershare video editors, this software doesn’t need a powerful machine. It can be installed computer that has 3 GB RAM.
Wondershare created it for the teachers, game lovers or anyone who want to create tutorial videos by recording screen.
DemoCreator Quick Walk Through: Now Let’s see how you can record screen & editing with demoCreator.
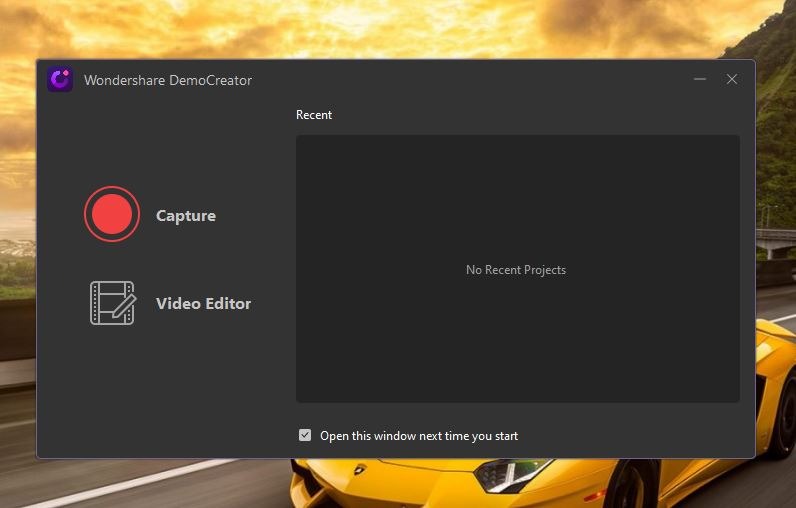
When you launch democreator, it will show you’ll be prompt to go to the editor or Capture button for screen recording.
If you press Capture button, it will ask to select area for recording.
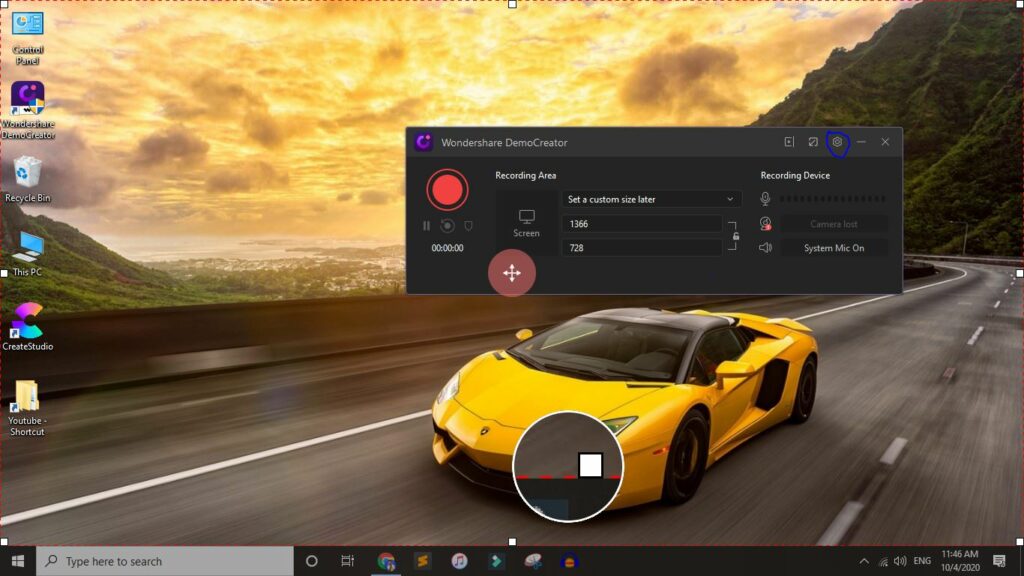
Click on settings icon, to change Frame Rate, Mic & system audio, Camera resolution, etc, and encoding & save location.
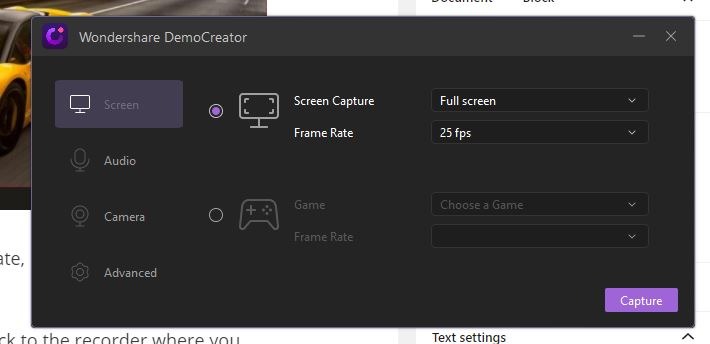
When you are done click on the Capture button. It will take back to the recorder where you need to press the RED button for recording.
Once your recording is done stop the recording from the box or press F10.
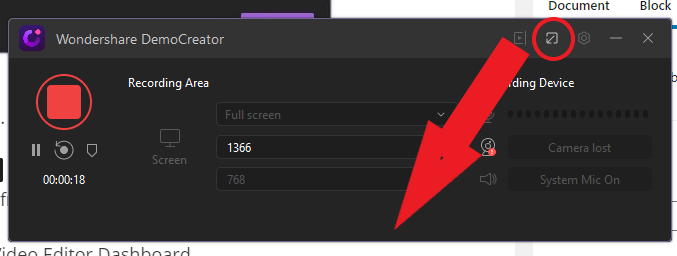
When you stop the recording, this will take you to the editor.
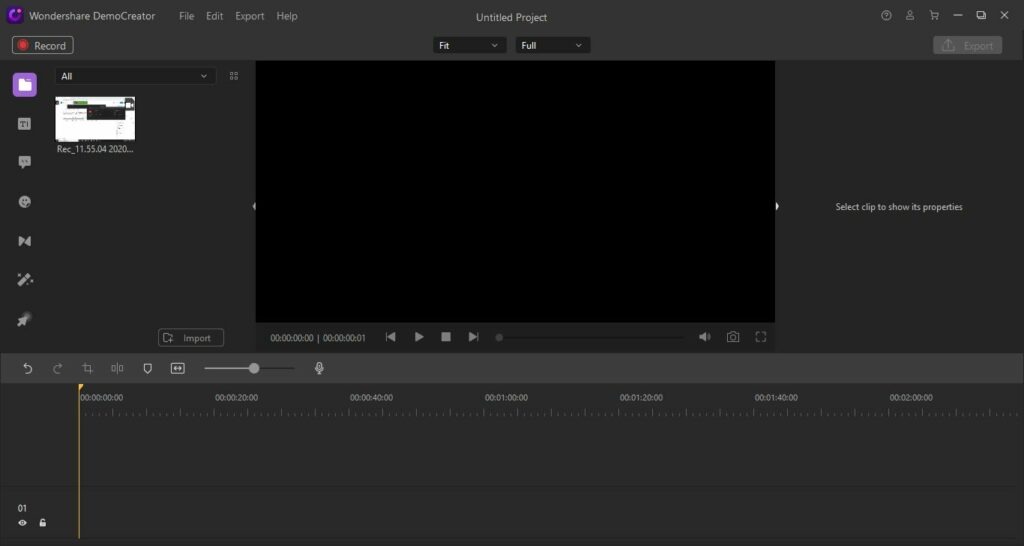
As you can see, at the bottom you have timeline. Drag & Drop your recorded file in the timeline.
At centre, we have preview window. In the left side bar all important sections such as Titles, callout, transitions etc. In the screenshot Media Menu is selected that is default.
On top of that, you have record button. If you want to record while editing your video. Above the timeline you have Microphone for voice over.
After Drag & drop, you can Trim the video, Apply mouse effects or text template. You just need to drag & Drop.
Not to forget you can import other media files as well while editing the video.
DemoCreator Features
Here in this section I will cover all important features of Democreator.
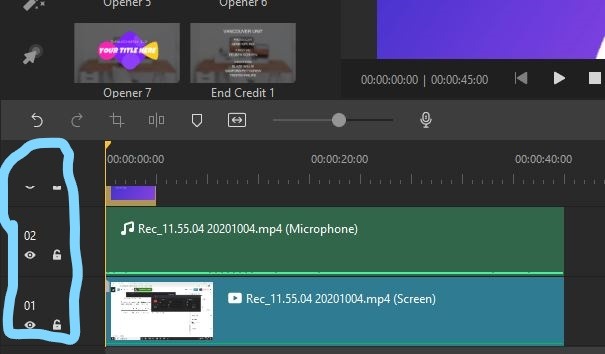
Different Layers while Recording: Once you Stopped the recording, It will take you to the editor. Where you will have three layers. Screen recording, Audio & camera Recording. You can edit all of them separately.
For example, you want to change the camera position, size or you want to delete specific camera part only.
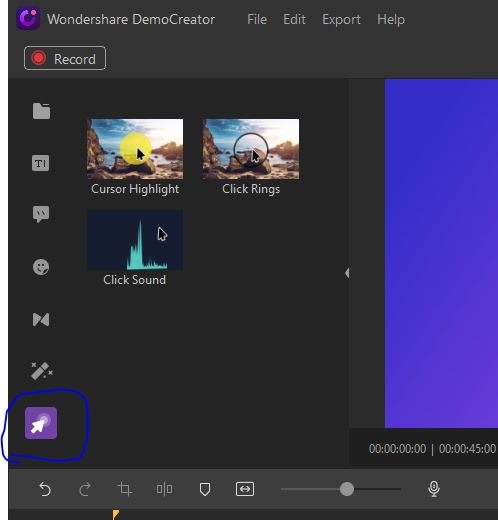
Apply mouse Effects Or scale the cursor: For How to Videos, applying mouse effects is beneficial for better understanding.
Inside the Democreator you can apply mouse effects as you can see in the screenshot. Not only this, but You can also scale the mouse cursor if you wanted to do it.
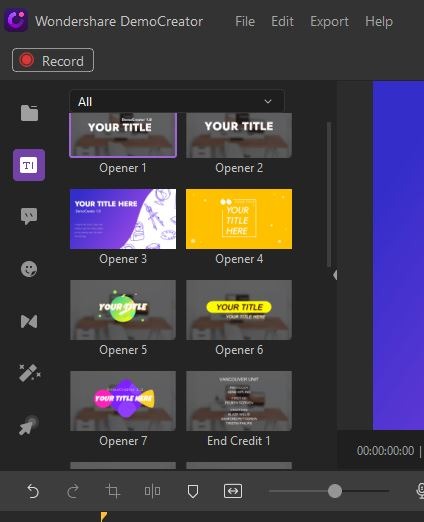
Pre-made text templates: Text is important for adding contact & other crucial information. I count you will get 20 pre-made titles that you can customize according to your needs.
You can change
- Font Family
- Size
- Color
- Border: Color, opacity, Blur & Size
- Shadow: Type, color, Blur & Distance
- Bold Italic & Text alignment
Annotations/Callout: Callout is important for teaching videos. All important annotations are available in the Democreator
- 7 types of Dialogue Box
- Line & Arrows: 8 Arrows & solid & dotted line
- Sketch Animation: These 9 rectangle, tick, line, etc contain animation.
- Shapes: Hollow circle, Octagon, Oval, Octagon, Rectangle, Square, Triangle, Star, Octagon, Oval, Pentagon, Rectangle, Round, square, star, Triangle, Rounded Rectangle & Hexagon
You just to drag & drop in the timeline on time where you want to add these things.
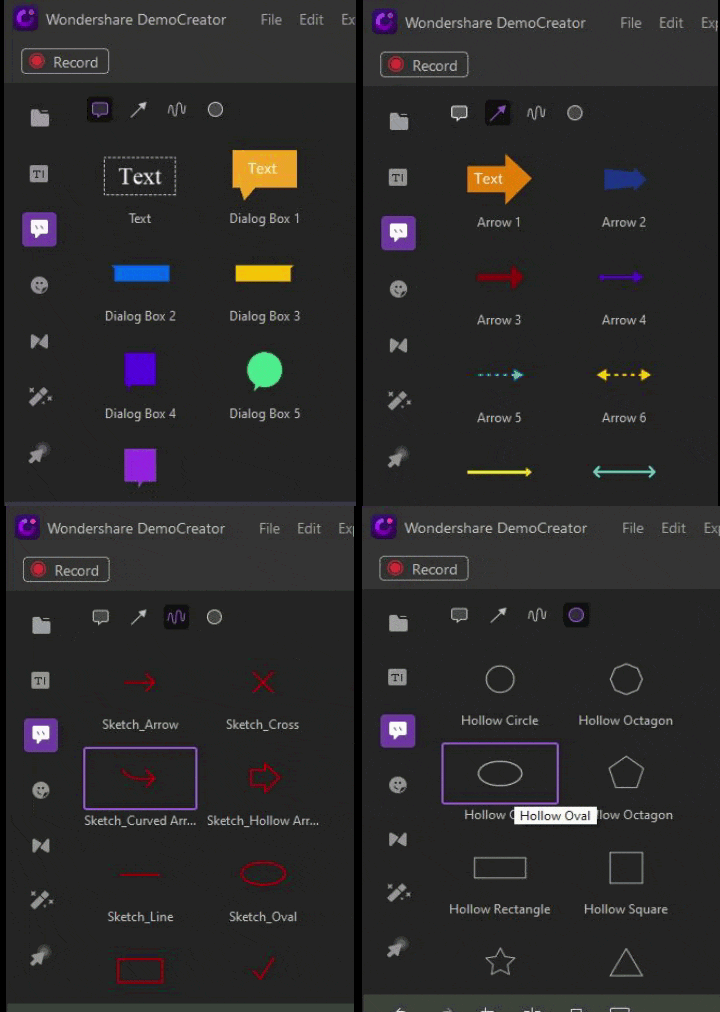
Stickers: Under the annotations, you can find stickers. I think gamers will love these stickers or anyone who want to create engaging videos. These stickers are divided into multiple categories.

Transitions: transition is basically animation that can apply between two clips. In the Democreator you will get 13 transitions.
Just drag & drop on between the two clip & your transition will be applied.
Effects: There is no special feature in the effects. You will get only 3 things. Green screen & Cinema21:9 & Mosaic
The green screen & Cinema are self-explanatory. Mosaic is to blur the specific part of the video to hide confidential information
Following features you will find above the Timeline.

Undo & Redo Buttons: This is a must for any video editor. You can also press the keyword keys ctrl+ z and ctrl+ y to undo & redo. Any text change, delete, etc can be undone & redo.
Crop: Crop is another basic thing that should be part of any video editor.
Record Voice: If you want to do voice over then after the timeline scale you can hit the mic button to record your voice.
You will get following features in the right sidebar. When you click on the video in the timeline.
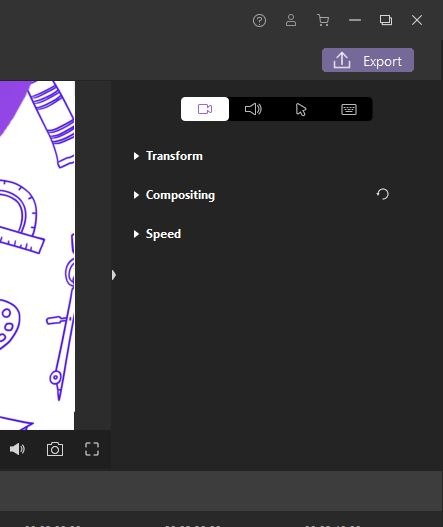
Composition: Here you can control the opacity of video. It can be useful when you have two or more videos but you want to show behind the upper video.
Except this, you can also apply Blending Mode. This also helps to decide how two layers will blend with each other. You will get pre-made profiles such as Darken, Color Burn, Color Dodge, etc.
Speed Control: Blow you then composition you will get speech scale. You can make slow & faster your video. Wondershare democreator allows up to 5x faster 10x slower
Audio Editing: Either you can want to control the volume or denoise for background noise removal.
Exporting Options: Either want to import video, Gif, or audio-only. Democreator allows you to do any of them.
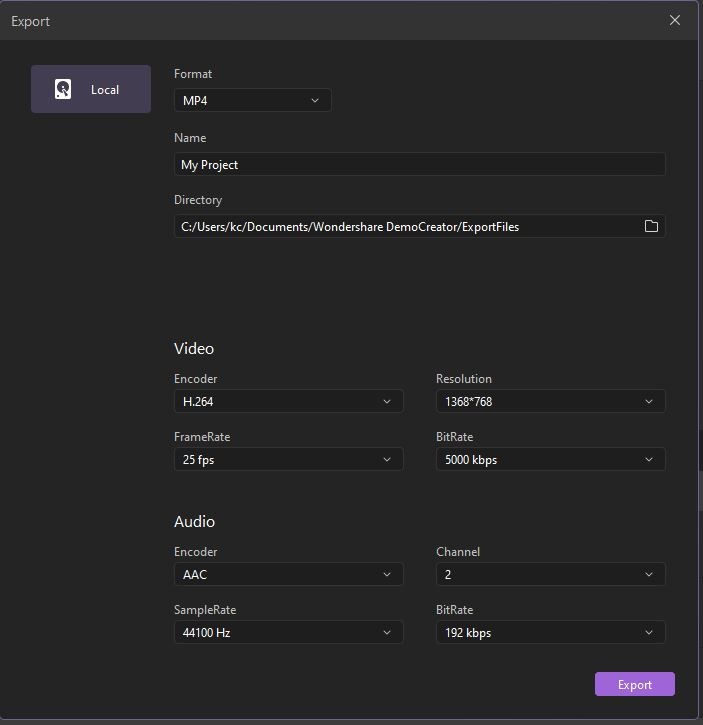
Except this you can control the Encoder, Resolution, FrameRate & Bitrate. It even has several settings for the Audio as you can see in the screenshot.
DemoCreator Pros & Cons
Every product has own pros & cons. Nothing is perfect in this world. Here are the advantages & limitation of wondershare democreator.
Pros
Easy to Use: Without a doubt, You can edit videos without learning about this software. It is so easy to use. Wondershare all products are user friendly.
Can be Installed on Any computer: Democreator doesn’t need powerful computer. It just need computer having 2 GB RAM. So if you are looking for easy editor then it is for you.
Cons
No Color Tuning Feature: You can’t control the brightness, saturation, etc. Basically, there is no option of controlling the color tuning
No Uploading Feature: Generally when I exporting my videos on filmora9, I will select the upload on youtube.
Transitions & Titles are less: I wish it has more transitions & titles. This is where democreator really sucks.
Price & System Requirements
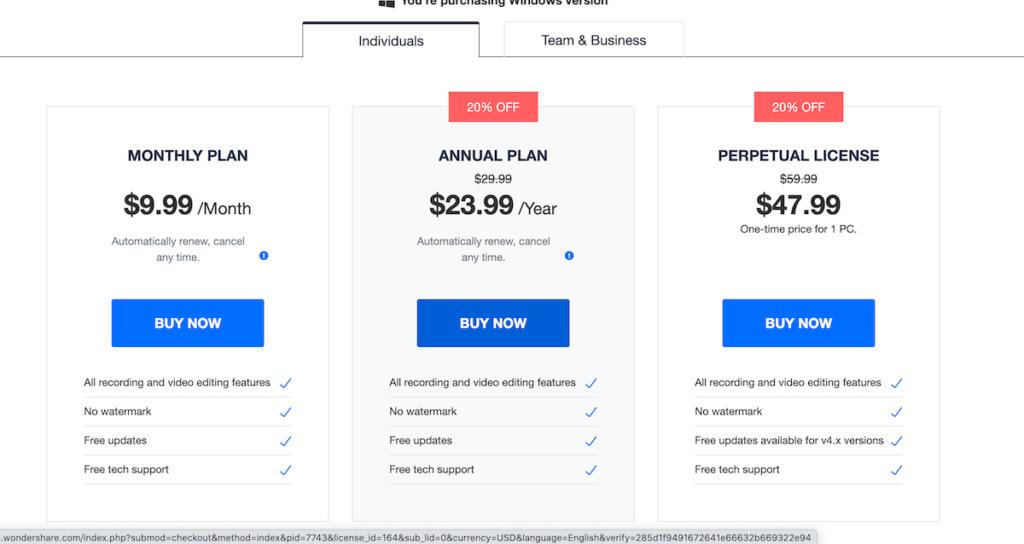
Either you want pay monthly & one time fees. Wondershare has suitable plan for all users. But before covering the price check system requirements.
Supported OS: Windows 7/ Windows 8 & Windows 10 (64 Bit)
Processor: Intel i3 or better multicore processor, 2GHz or above.
RAM: 3GB physical RAM (8GB required for HD and 4K videos)
Screen Resolution: 1366*768 or Higher
Disk: 2GB free hard-disk space (SSD recommended for editing HD and 4K videos)
Here is price plans of democreator
Comparison with Other Products
Democreator isn’t the first video editor. In fact, Wondershare already developed 3 video editors before launching this.
But every software target a specific audience. Democreator is mainly for training videos, gamers, or anyone who wants to create tutorial videos by recording screen.
Filmora9 is the biggest competitor of democreator. In my opinion, If you want an advance screen recorder, meaning you want to apply mouse effects, record the camera simultaneously & need basic editing, then Democreator is the best option.
But if you need a basic screen recorder with an advance editor then you should consider Filmora9. Wondershare filmora9 need 8 GB RAM for smooth performance. It will cost you $70 for lifetime support & updates
Conclusion
Anyone who wants to create teaching videos by recording screen & camera or gamers this is one of the best software in the market.
But it is definitely not for advance video editing. What you think about this new wondershare product. Your comment can help people like you.